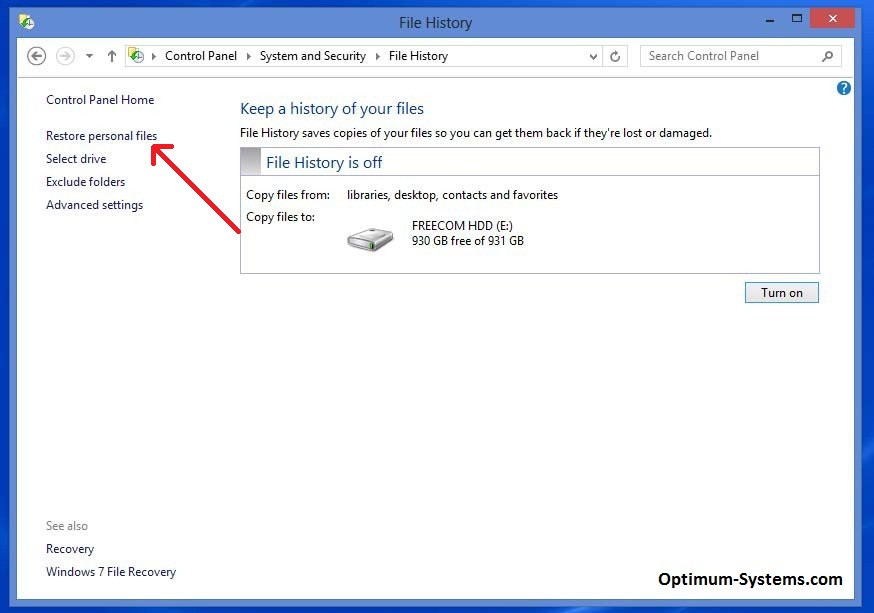
A lot of new users of Windows 8 are not aware how to back up their operating system and prevent sudden data loss in case of a nasty computer crash. There are factory-loaded tools embedded in this version of Windows: these tools include backup features such as File History backup.
File History enables you to take backup automatically on an external HD. This feature works closely with files and folders saved in Windows Libraries which include documents, music, video folders, contacts, favourites and anything else on desktop.
This feature of Windows is easy to use once you configure it properly. Follow the steps given below to configure Windows 8 File History.
· Search for File History
· Detect an external drive
· Backup Data
· Use Advanced Settings
· Limit Disk Space for Backup
· Specify duration of backup
Search for File History.It’s very simple to search for File History in Windows 8. Here are instructions.
1. Open Settings from Chime Bar
2. Type in “File History” without quotes
3. You can find this (file history) feature under System and Security in Control Panel of Windows8
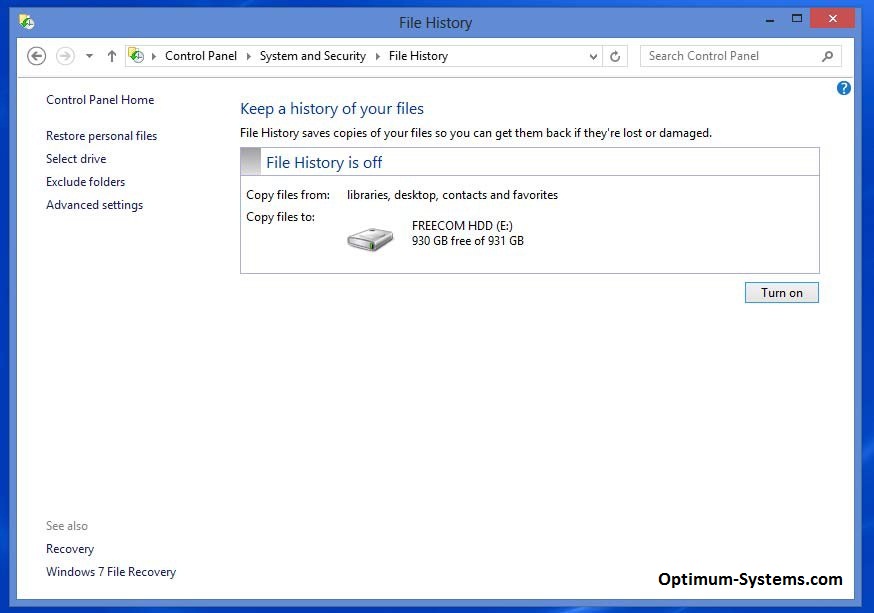
Detect an External DriveYou do not need anything get done to detect an external drive. Once you open File History, it would automatically detect an external drive for backup. Here it goes
1. Open File History
2. Select the location by clicking on Select Drive | Turn ON
3. It would get started automatically
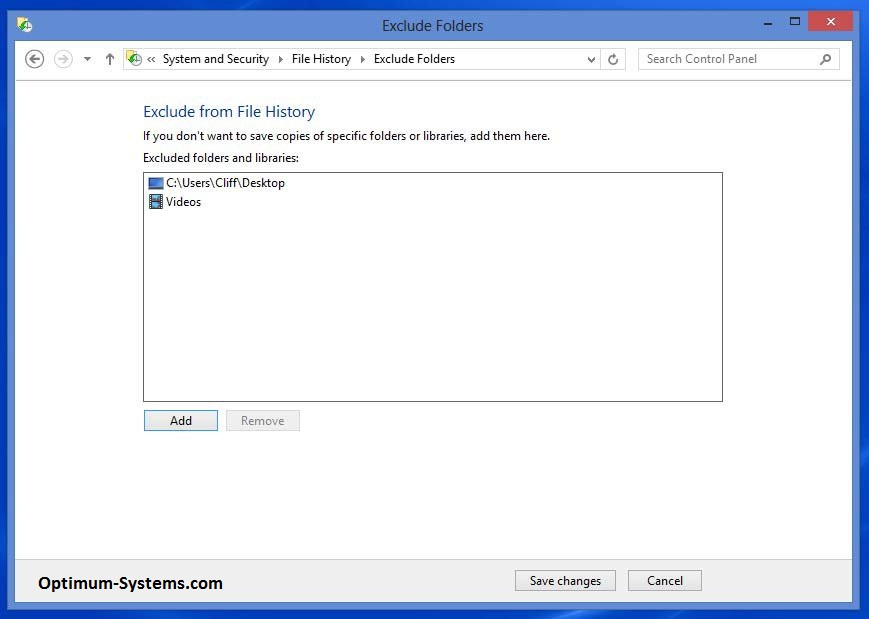
Backup DataOnce your external drive is detected, it’s time to backup data such as music, videos, content from desktop and in fact all of your libraries. If you do not want to take backup of certain folder you can simply exclude it. Follow the procedure given below.
1. In File History click on Exclude Folders
2. There would be Add button—click on it to add the paths
3. Finally click on Save Changes
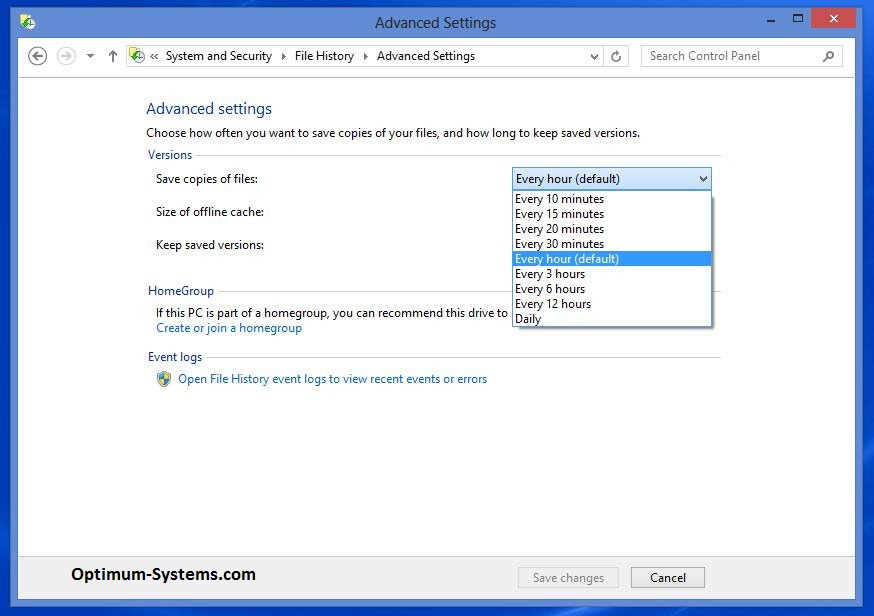
Use Advanced SettingsAdvanced settings are meant to modify File History feature. Through these settings you can set schedule for backups. Follow the steps given below to use Advanced Settings.
1. Open File History
2. Click on Advanced Settings
3. Click on Default settings which are set to Every hour
4. From the drop down you can select specific time frame
Limit Disk Space for BackupYou might have limited disk space where you cannot store unnecessary backups. For this reason you can limit disk space for backup. Perform steps given below to limit disk space.
1. Open File History | Click on Advanced Settings
2. Select the Option OFFLINE CACHE
3. Select the limit on amount of disk space for backups
4. Click on Save Changes once done
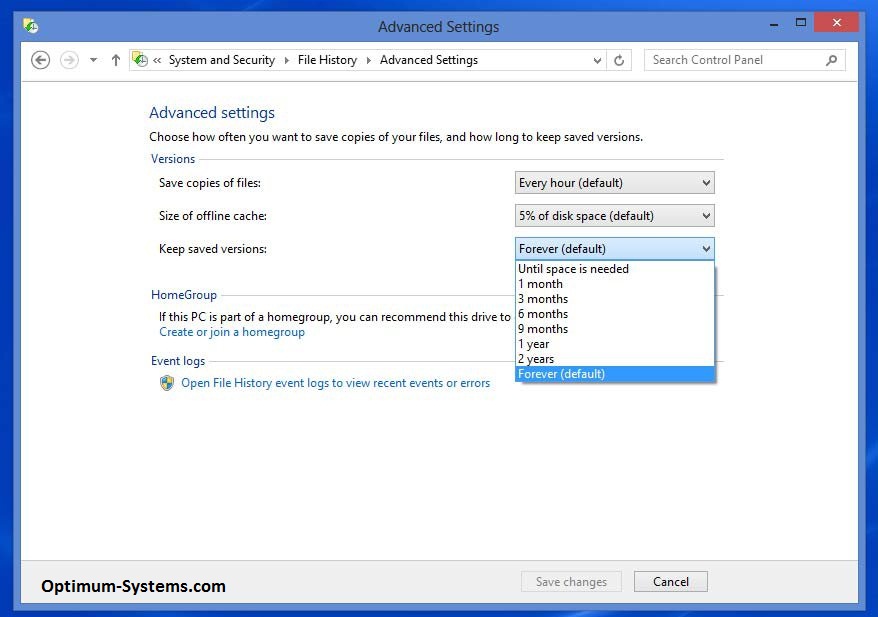
Specify Duration of BackupsSpecifying duration of backups is important because you can set how long you would keep old versions of files. It could be for specified time period or forever.
You can restore personal files as well. To restore personal file, you need to GOTO File History in Control Panel. To restore personal files click on the Restore button.

